Changing DNS on your Google Wifi router
If you have a Google Wifi router then it only supports what Control D call “Legacy DNS”, unencrypted DNS servers.
If you’re looking to change the DNS addresses to use something like Control D, NextDNS, Google DNS or something else, then here’s how you’d do it.
Before you start
You’ll need your IPv4 and possibly IPv6 addresses - IPv4 looks like 8.8.4.4 and IPv6 looks like 2001:4860:4860:0:0:0:0:8844. You’ll probably have two addresses for each IPv4 and IPv6.
The steps
Open the Google Home app on your phone.
The Google Home app looks different for different people right now as a new version is being rolled out; For us, we pressed the “Wifi” button, then pressed the button that says “3 points online”. Older versions might have a button with a picture of your router on it.
However you get there, you’ll see a list of all the routers you have in your house:
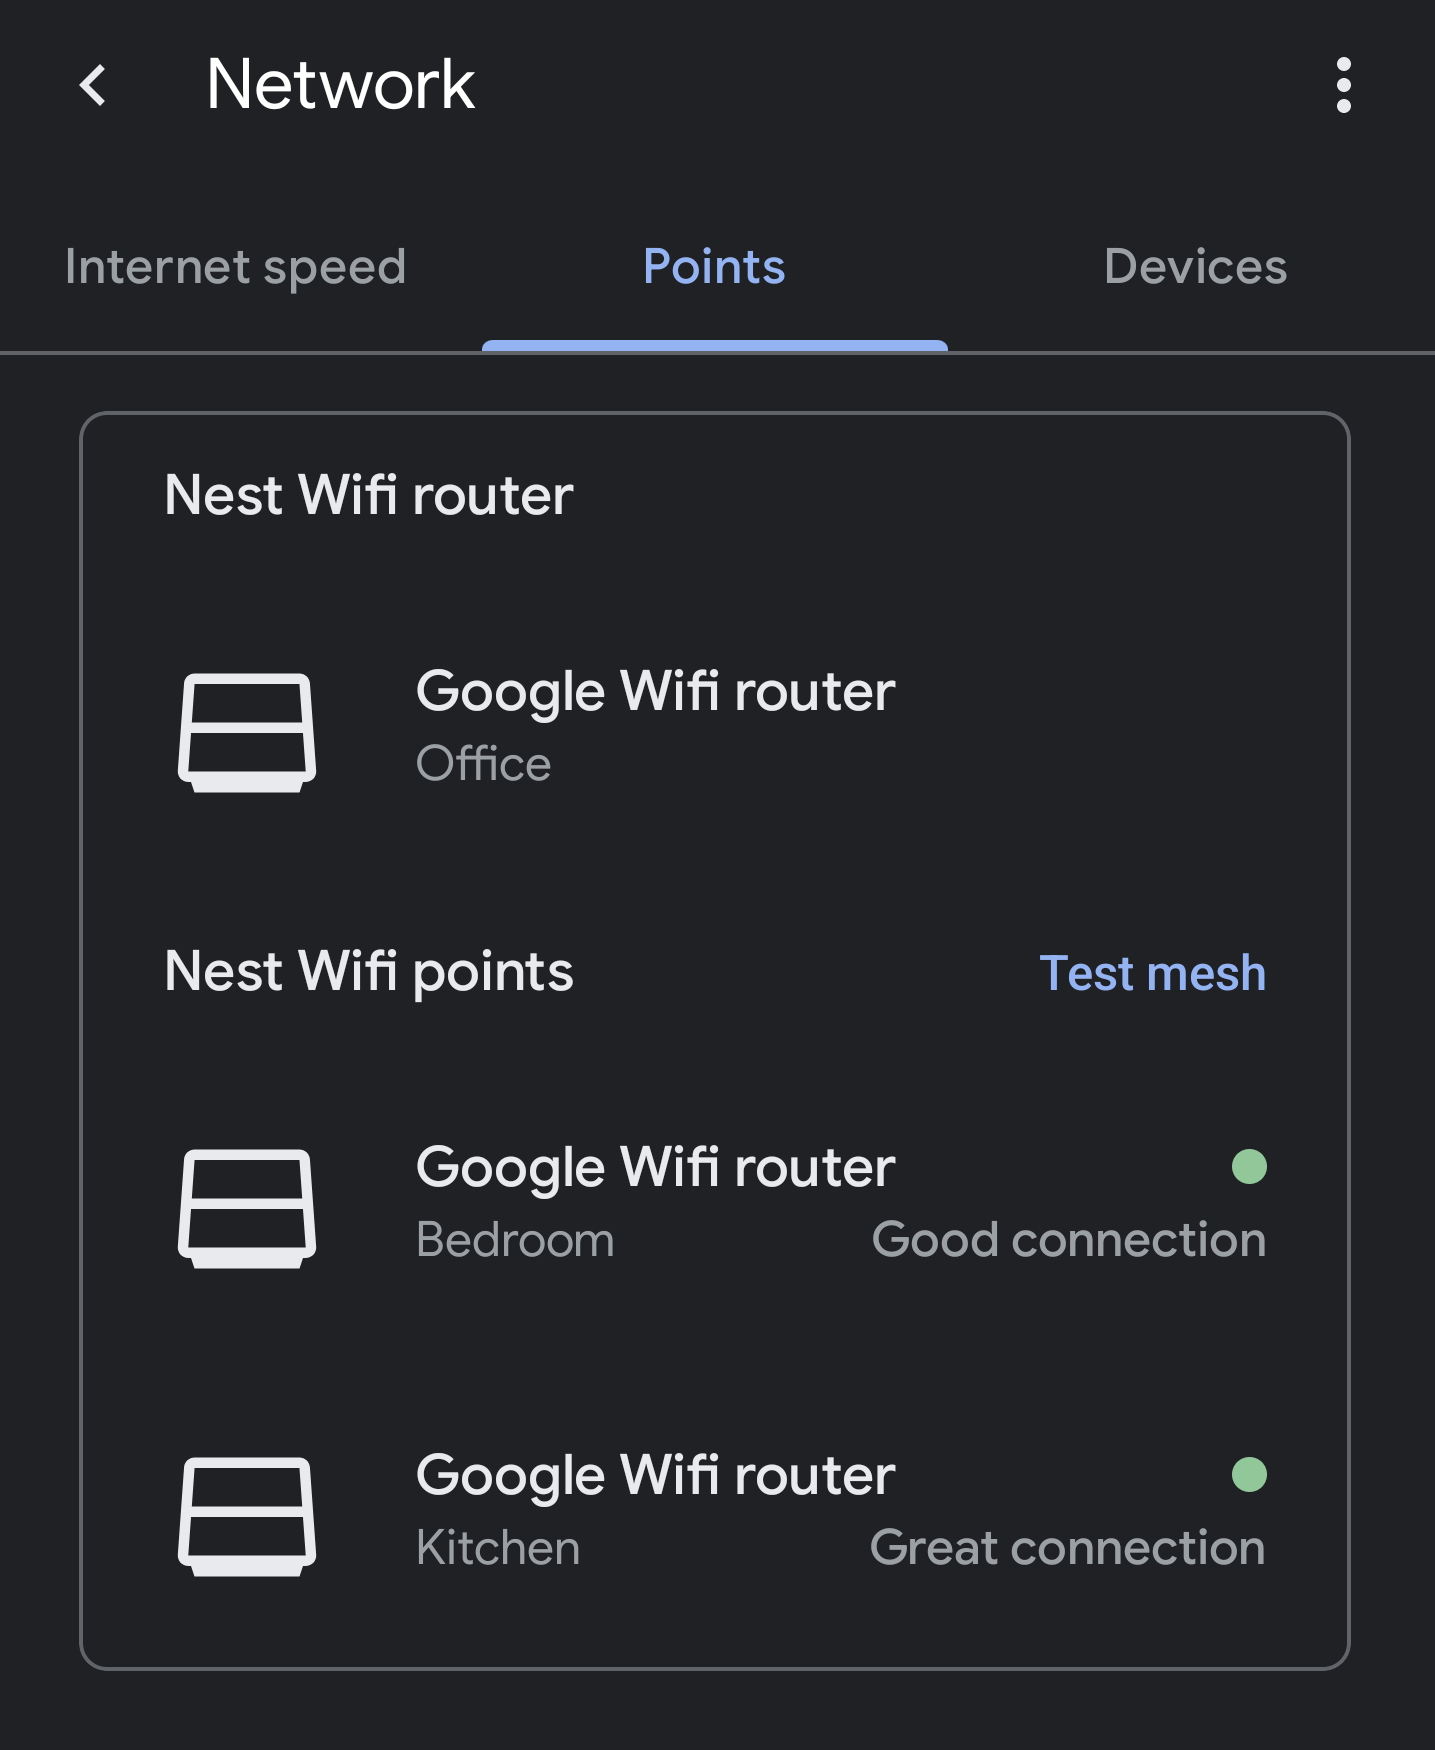
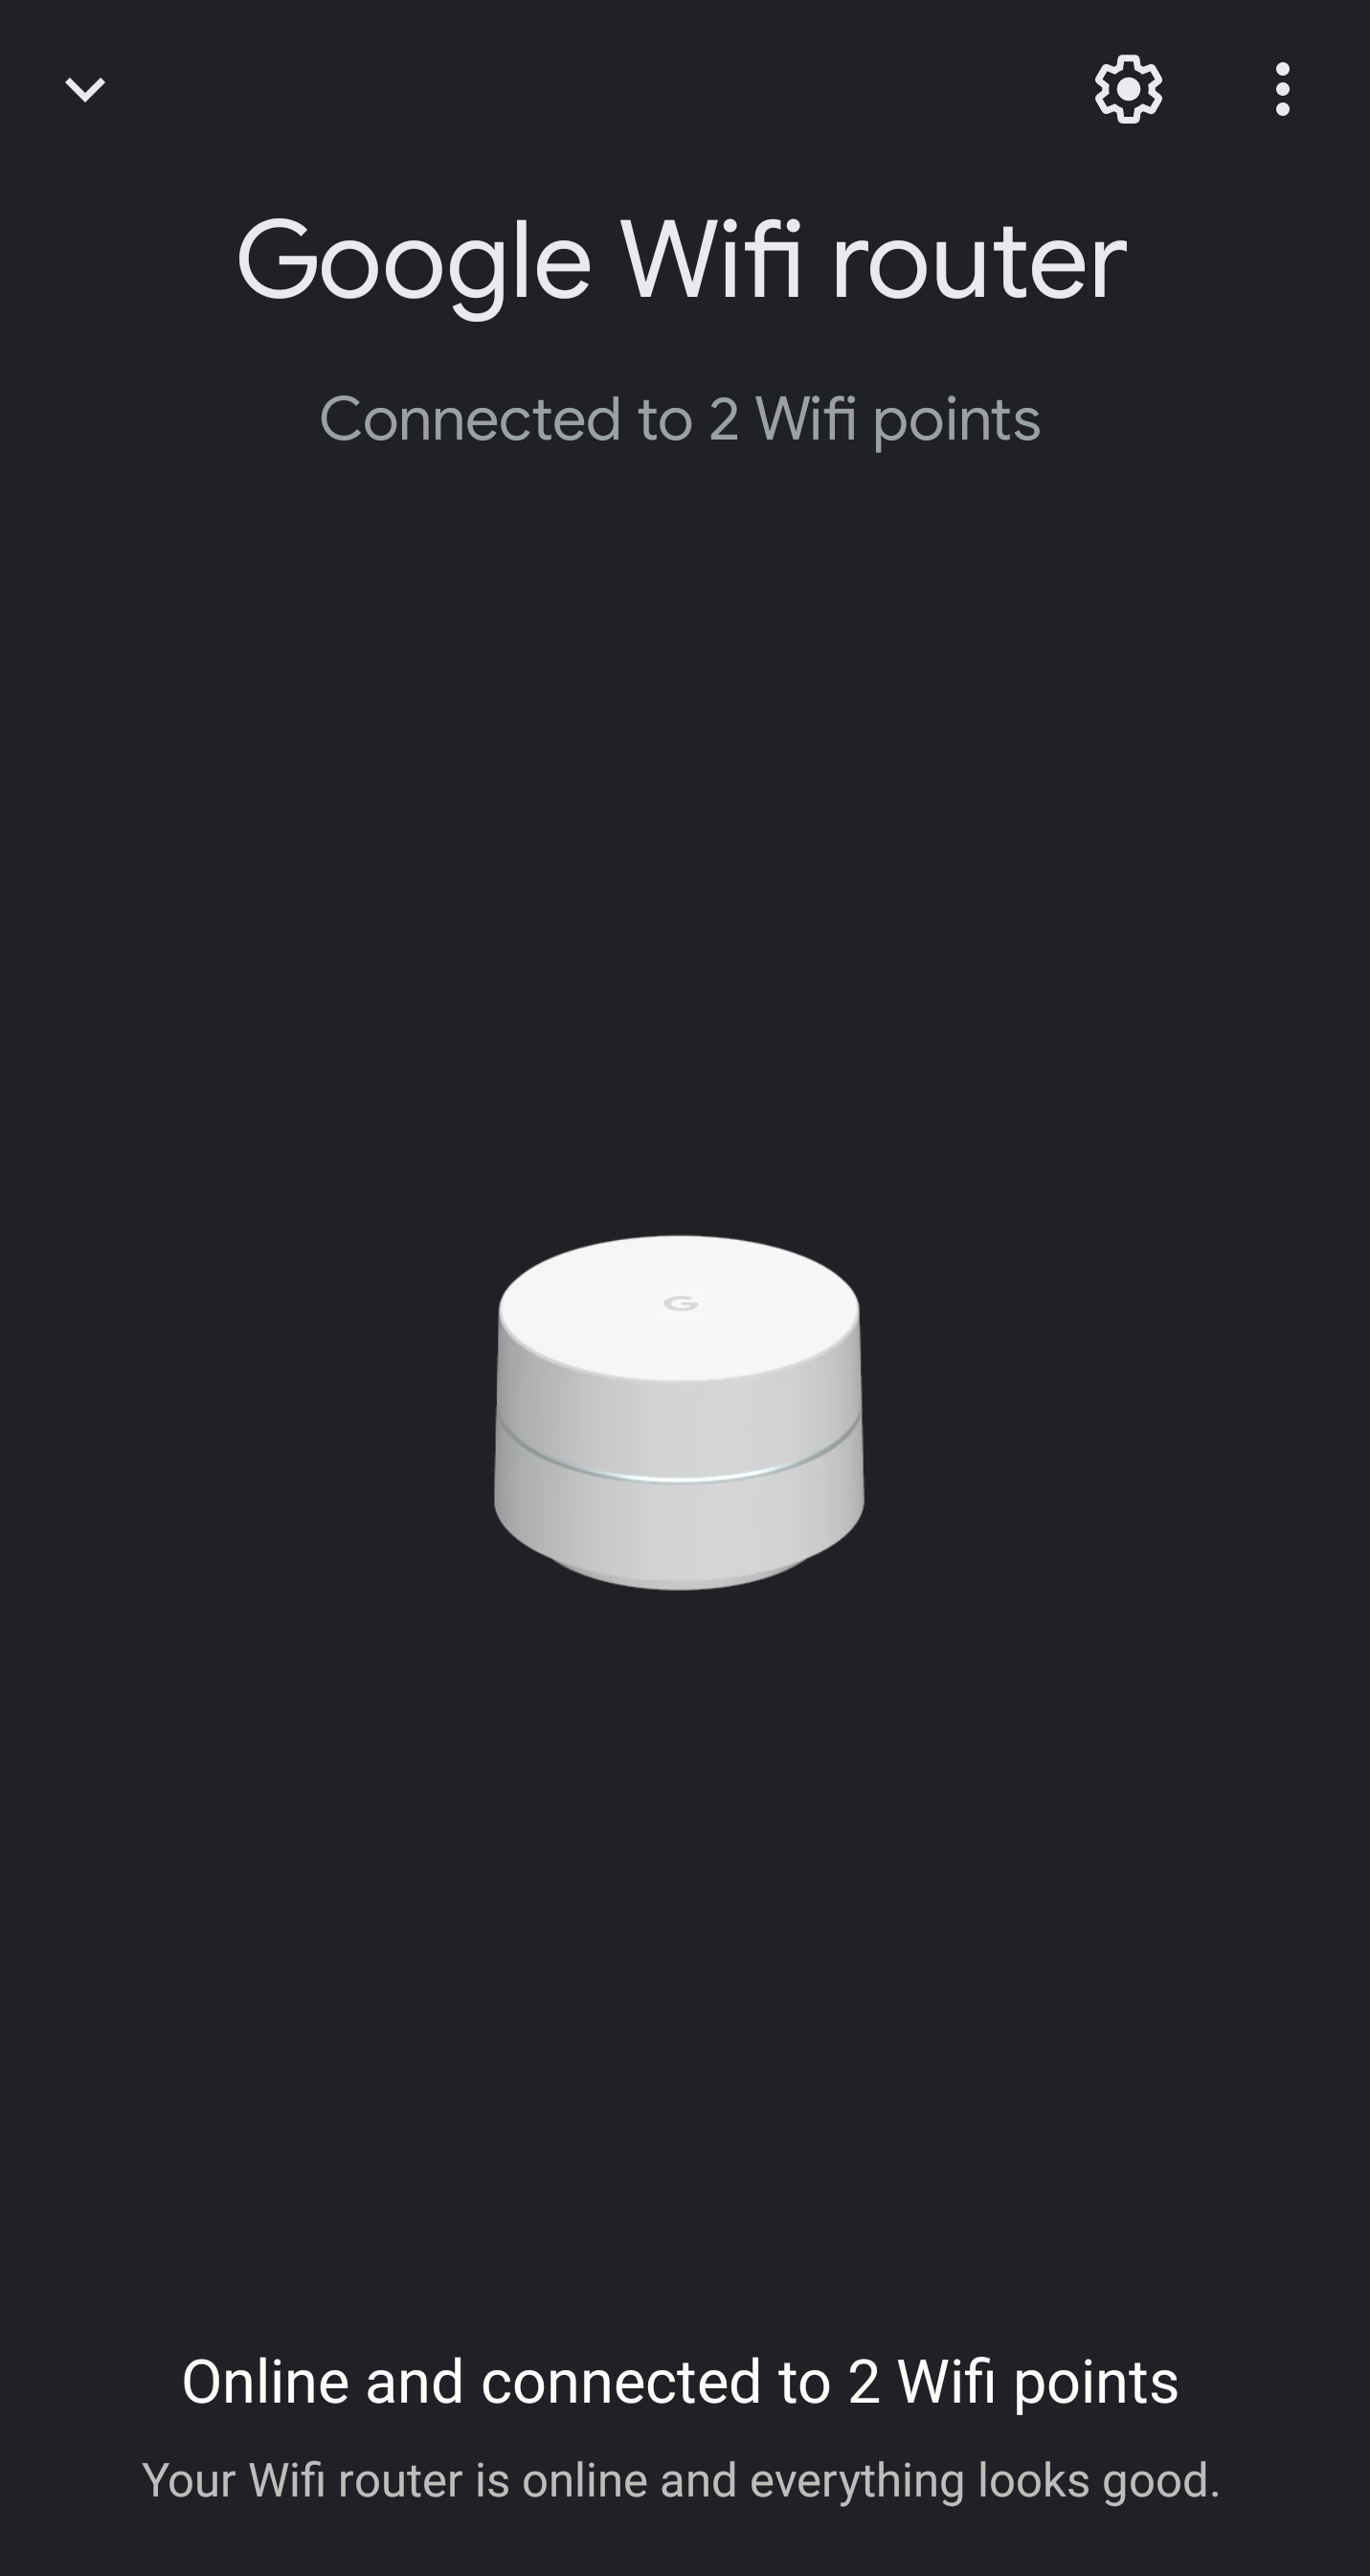
Press the router - the one that’s connected directly to the internet, and you’ll get a lovely picture of it:
Press the ‘cog’ setup button on the top right of the screen, to find this Device Settings screen:
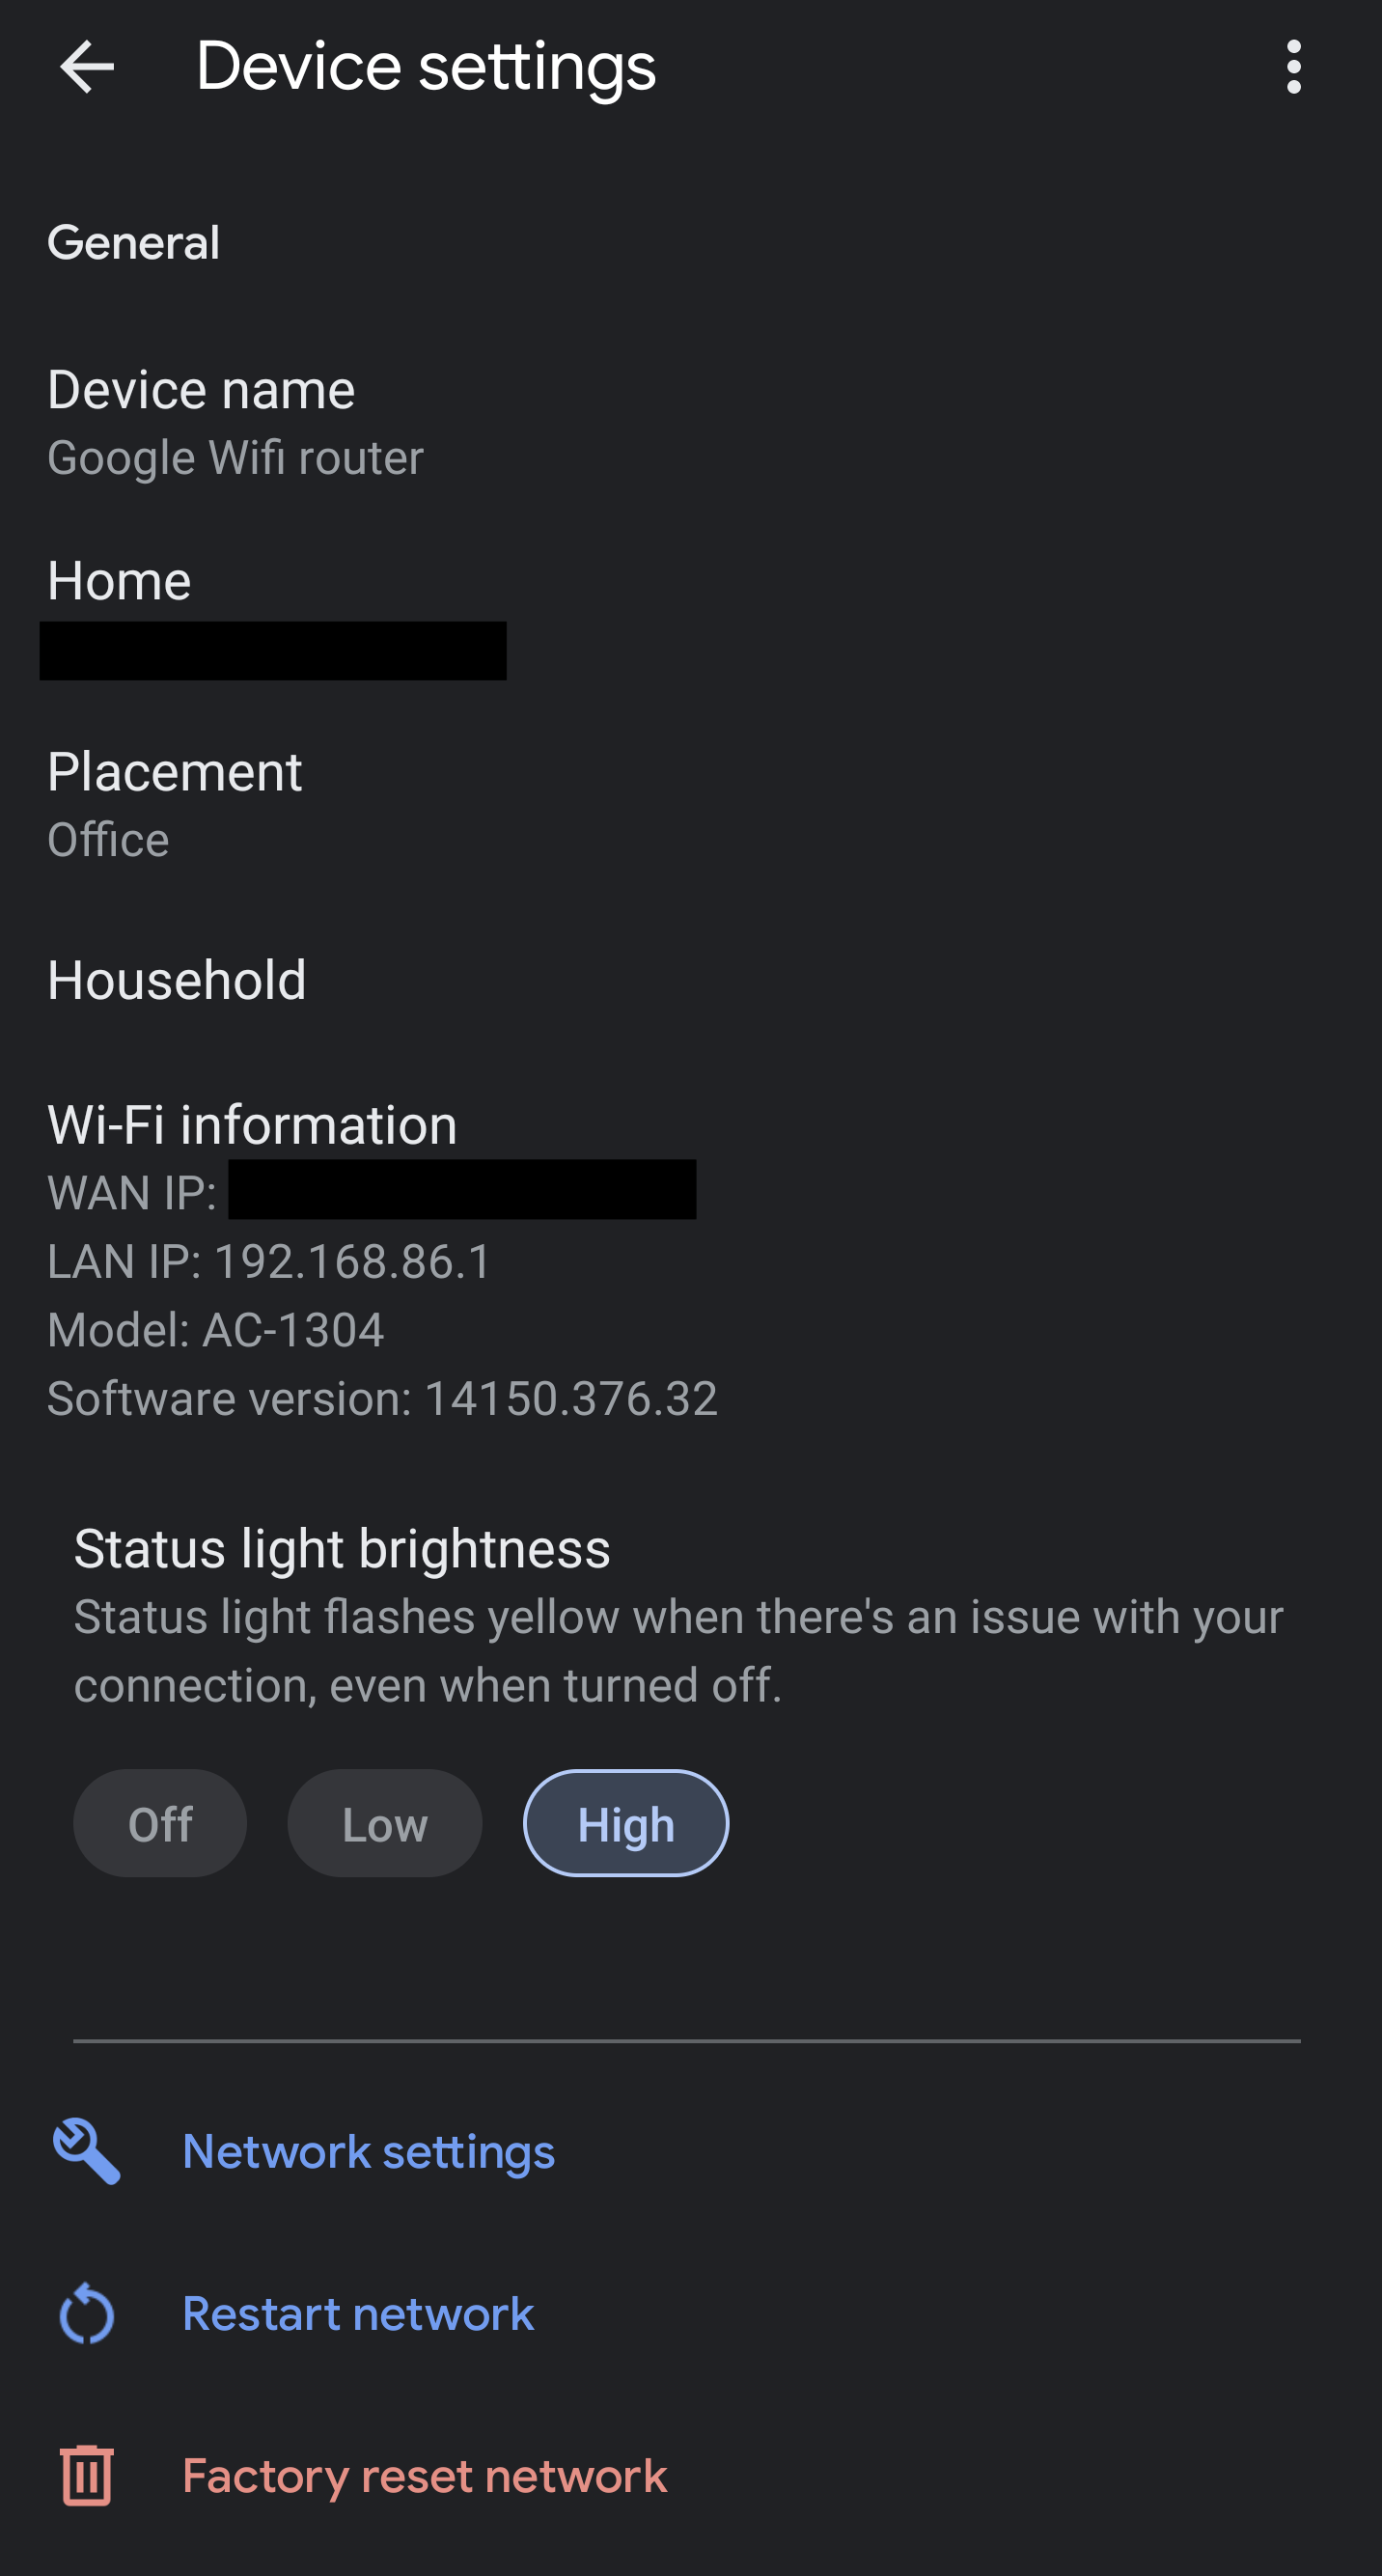
See the spanner at the bottom marked “Network settings”? Hit that,
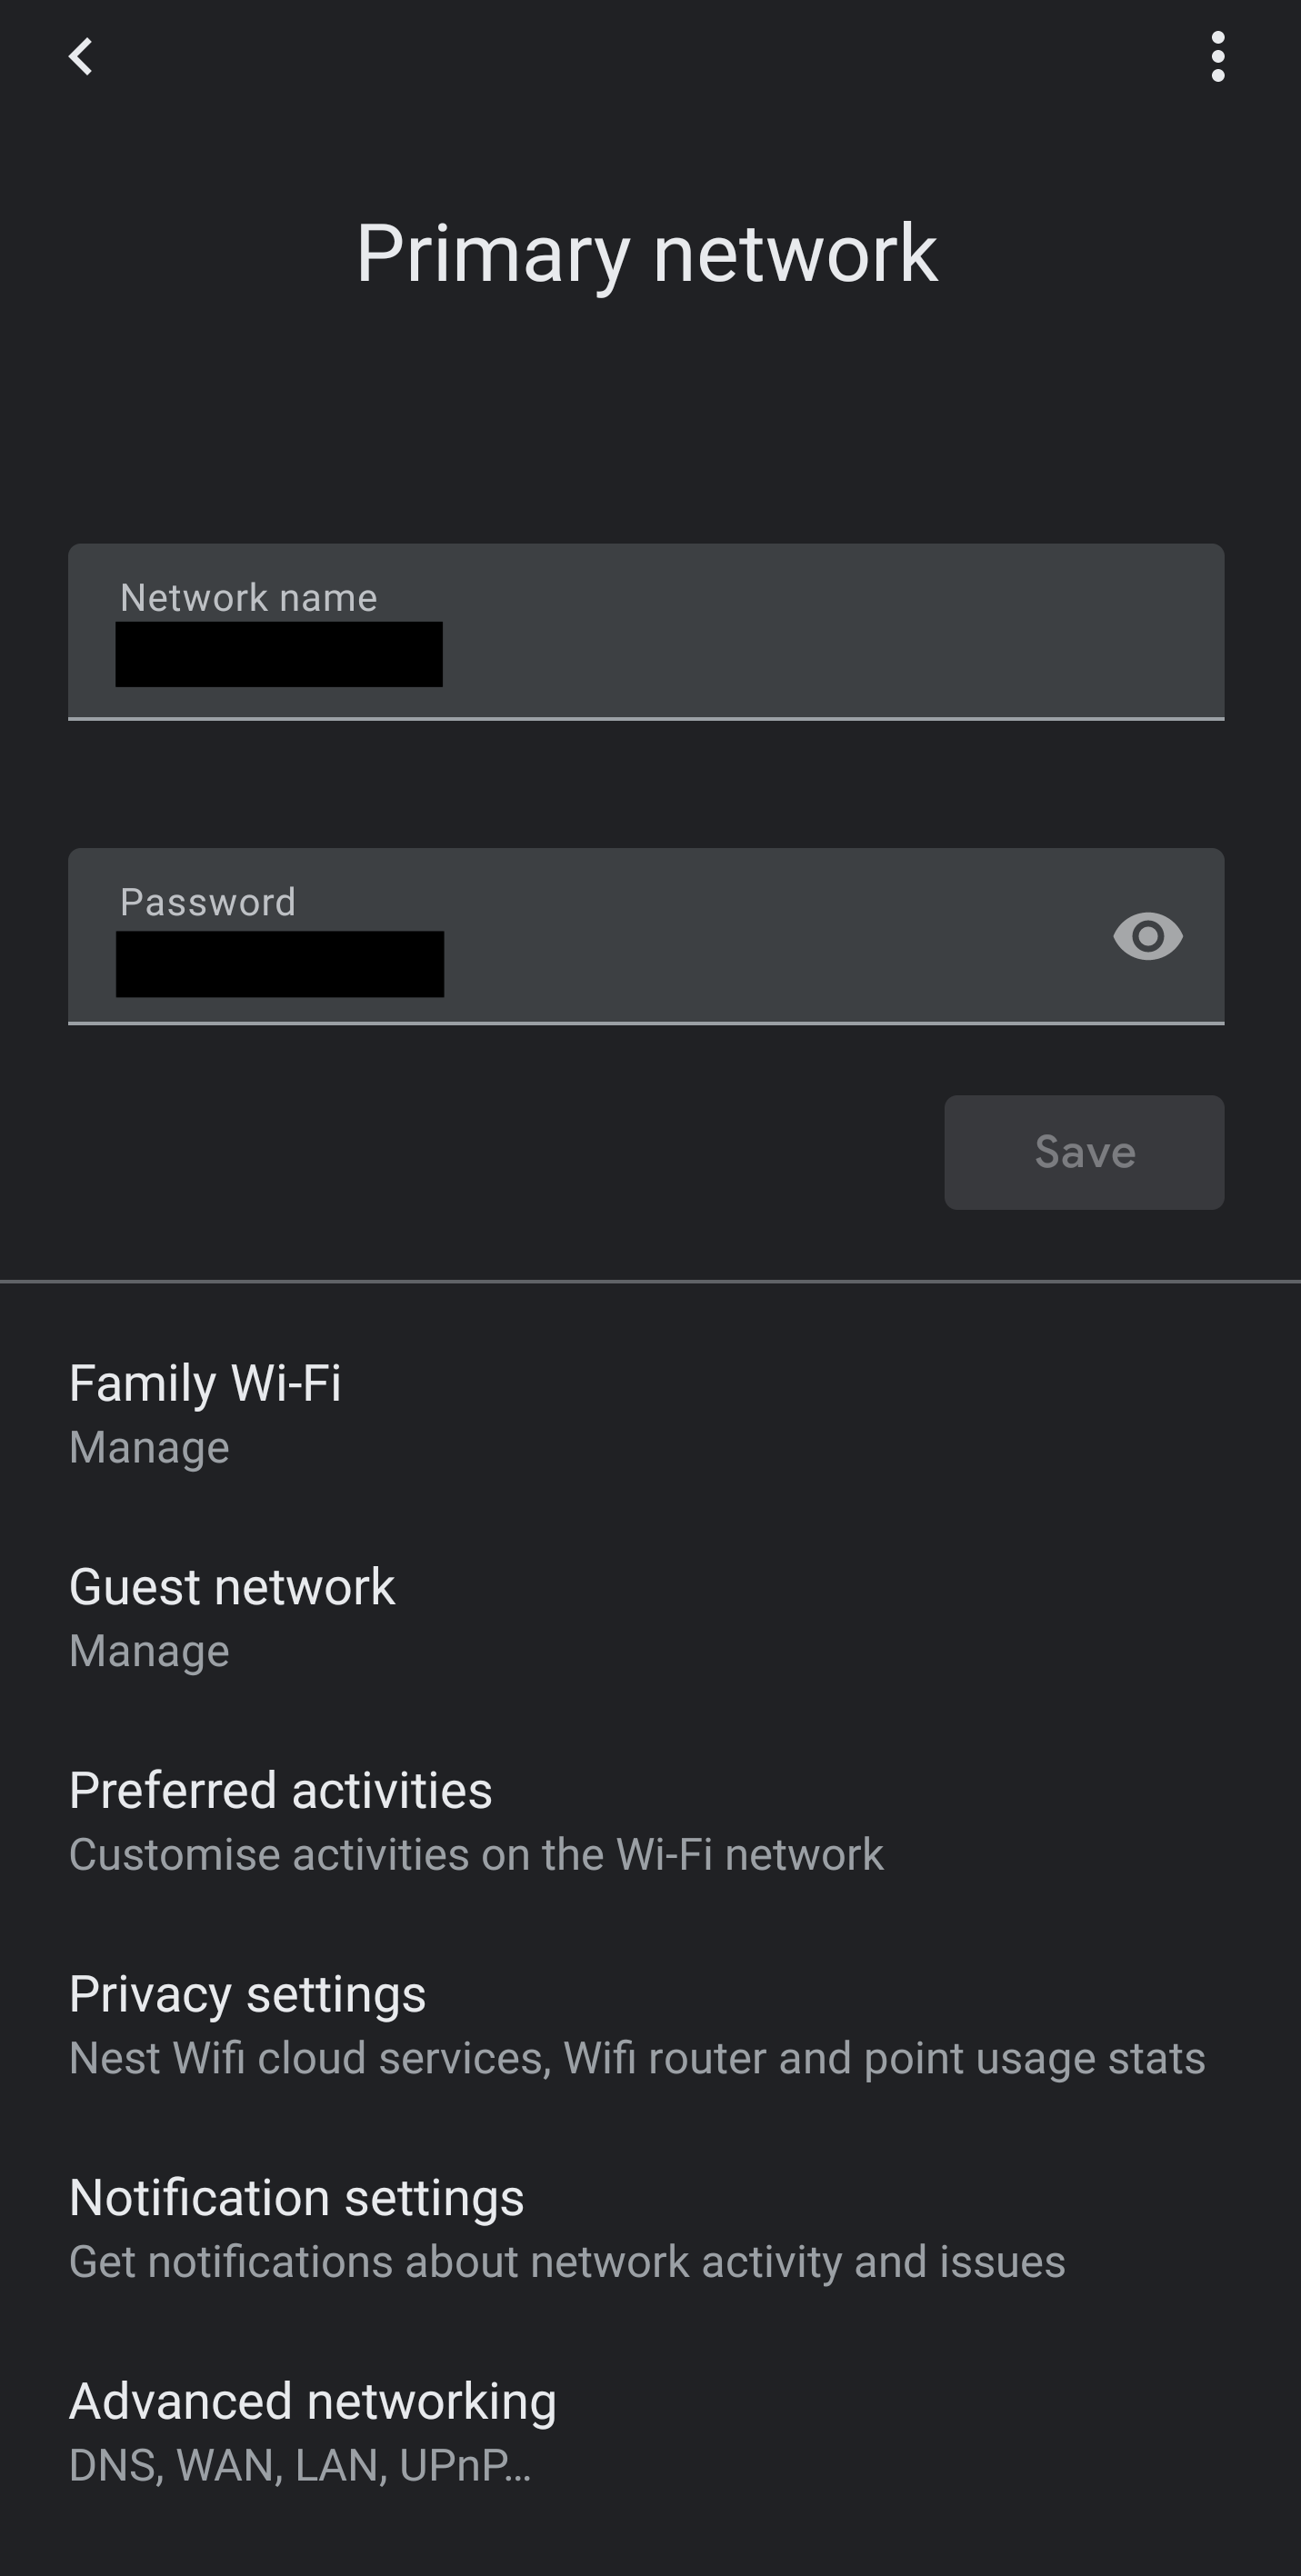
Here’s where you can see your wifi’s name and password, and right at the bottom of the screen, a thing called “Advanced networking - DNS, WAN, LAN…”. Hit that to get into the Advanced Settings screen.
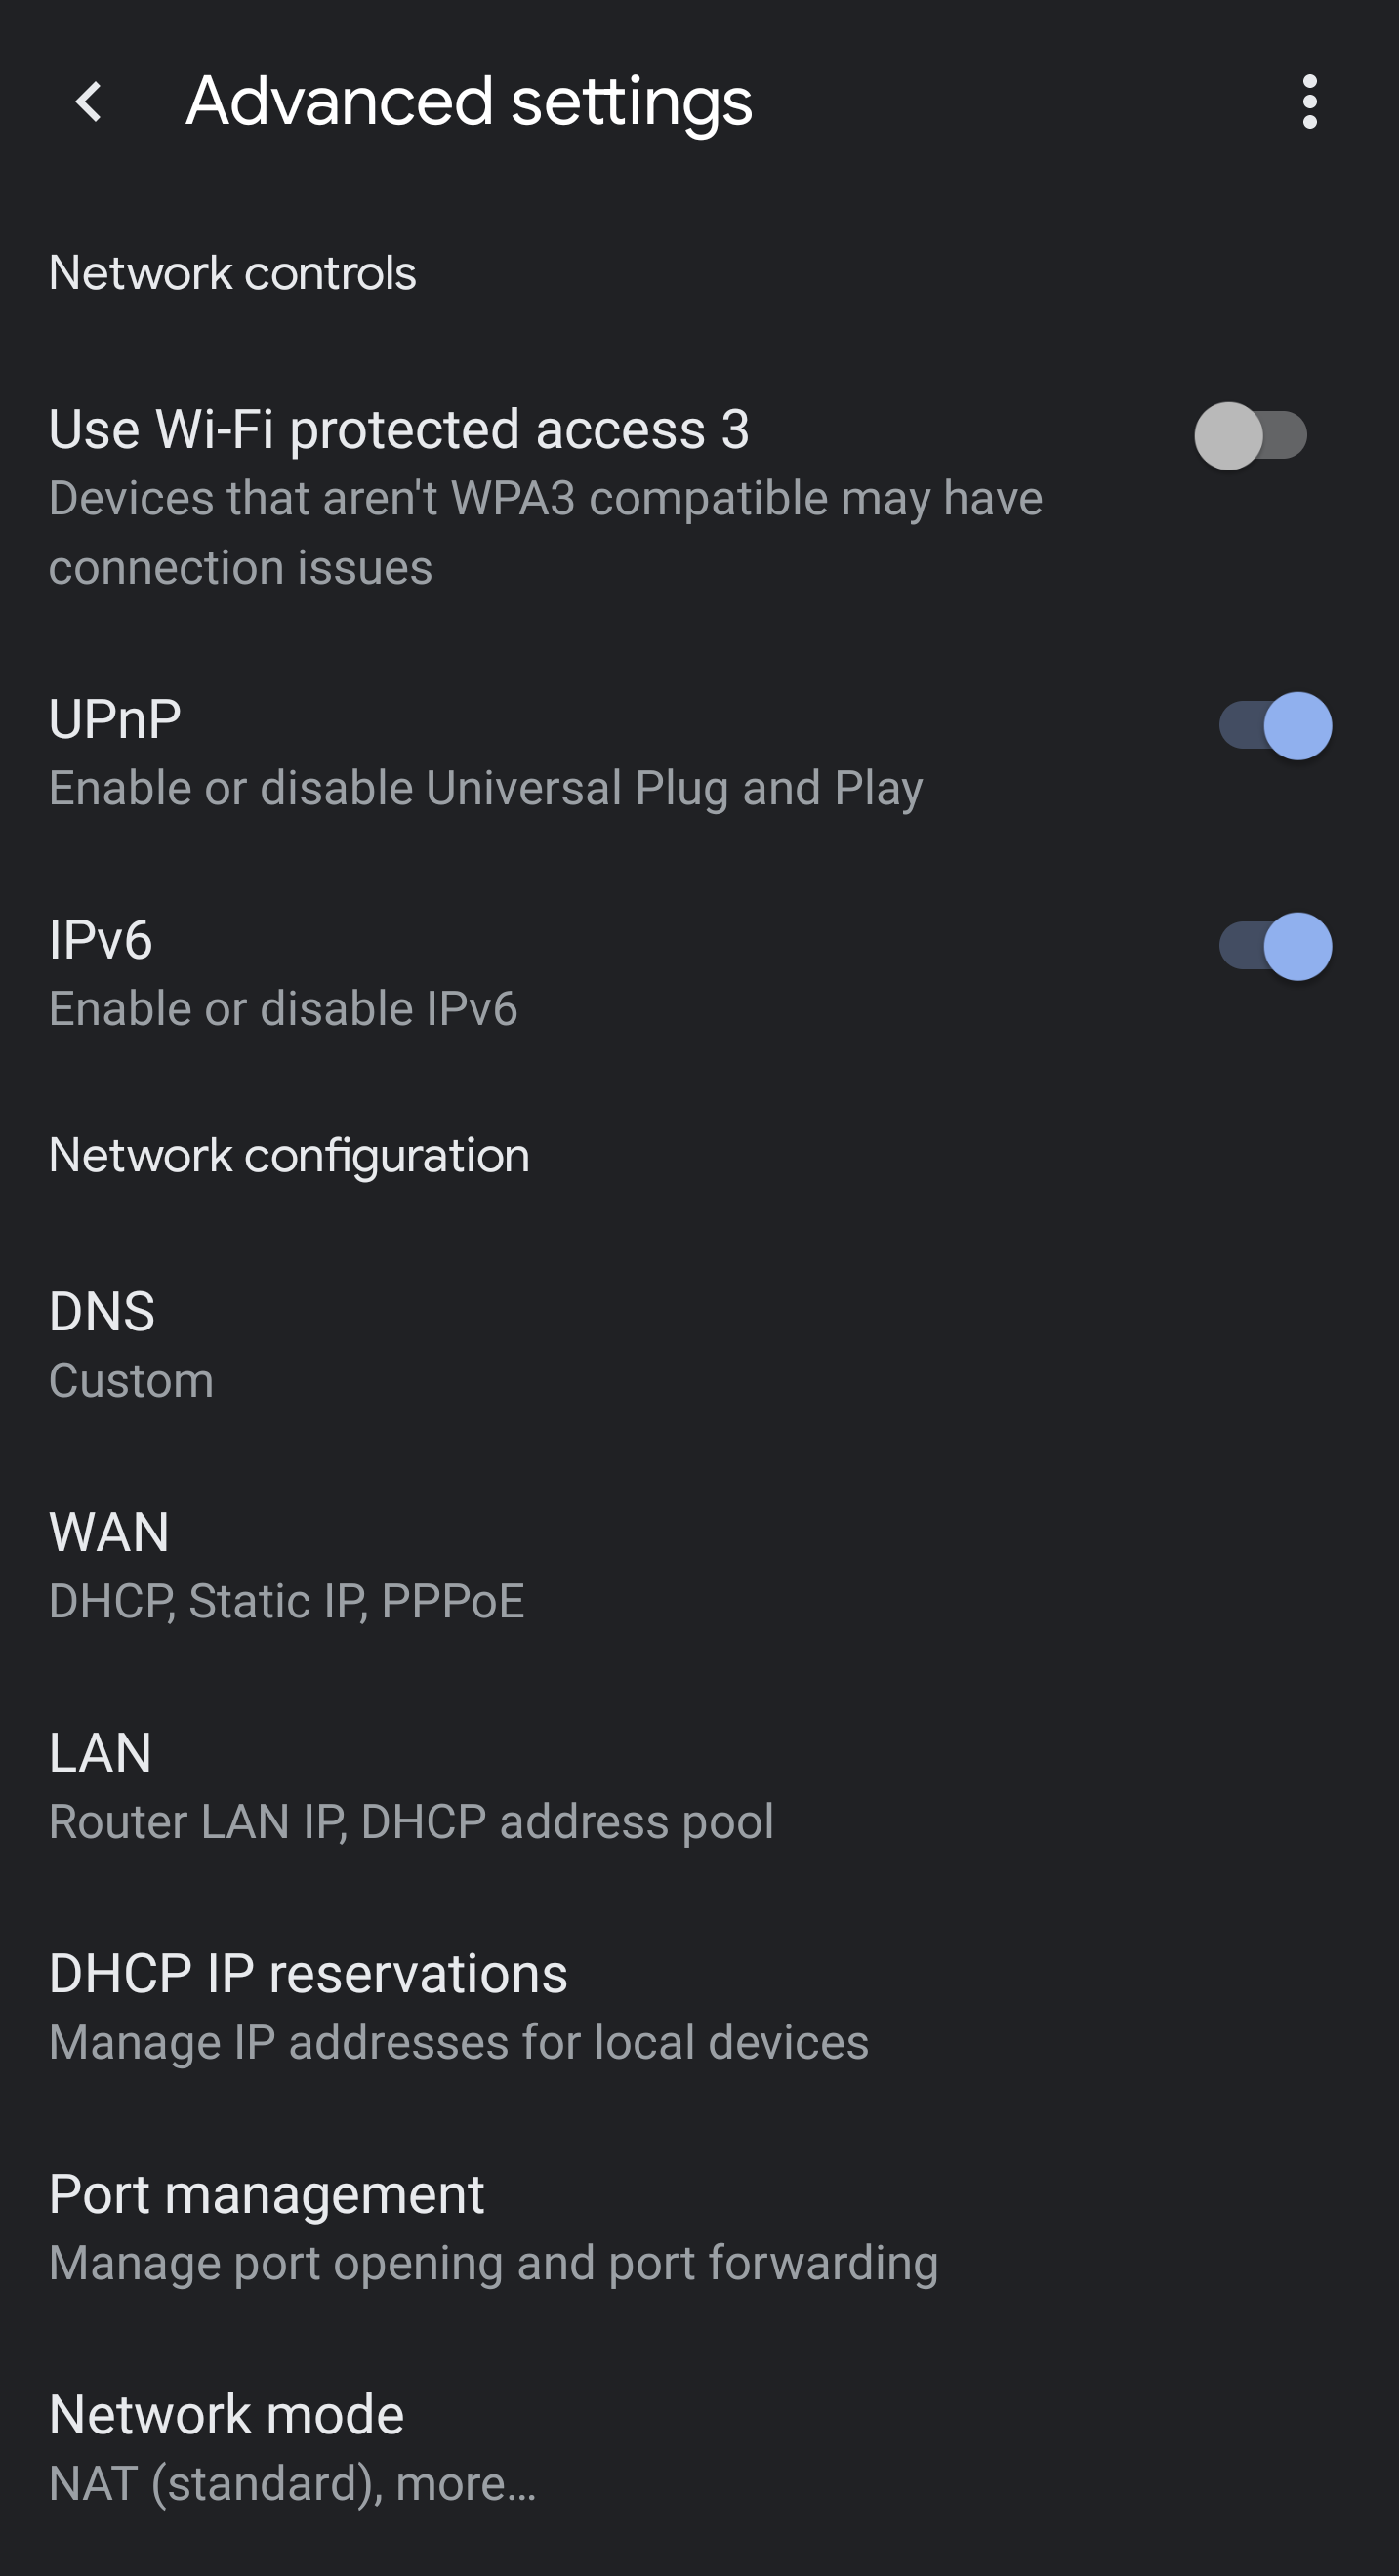
Nearly there. You want the “DNS” item here. Hit that…
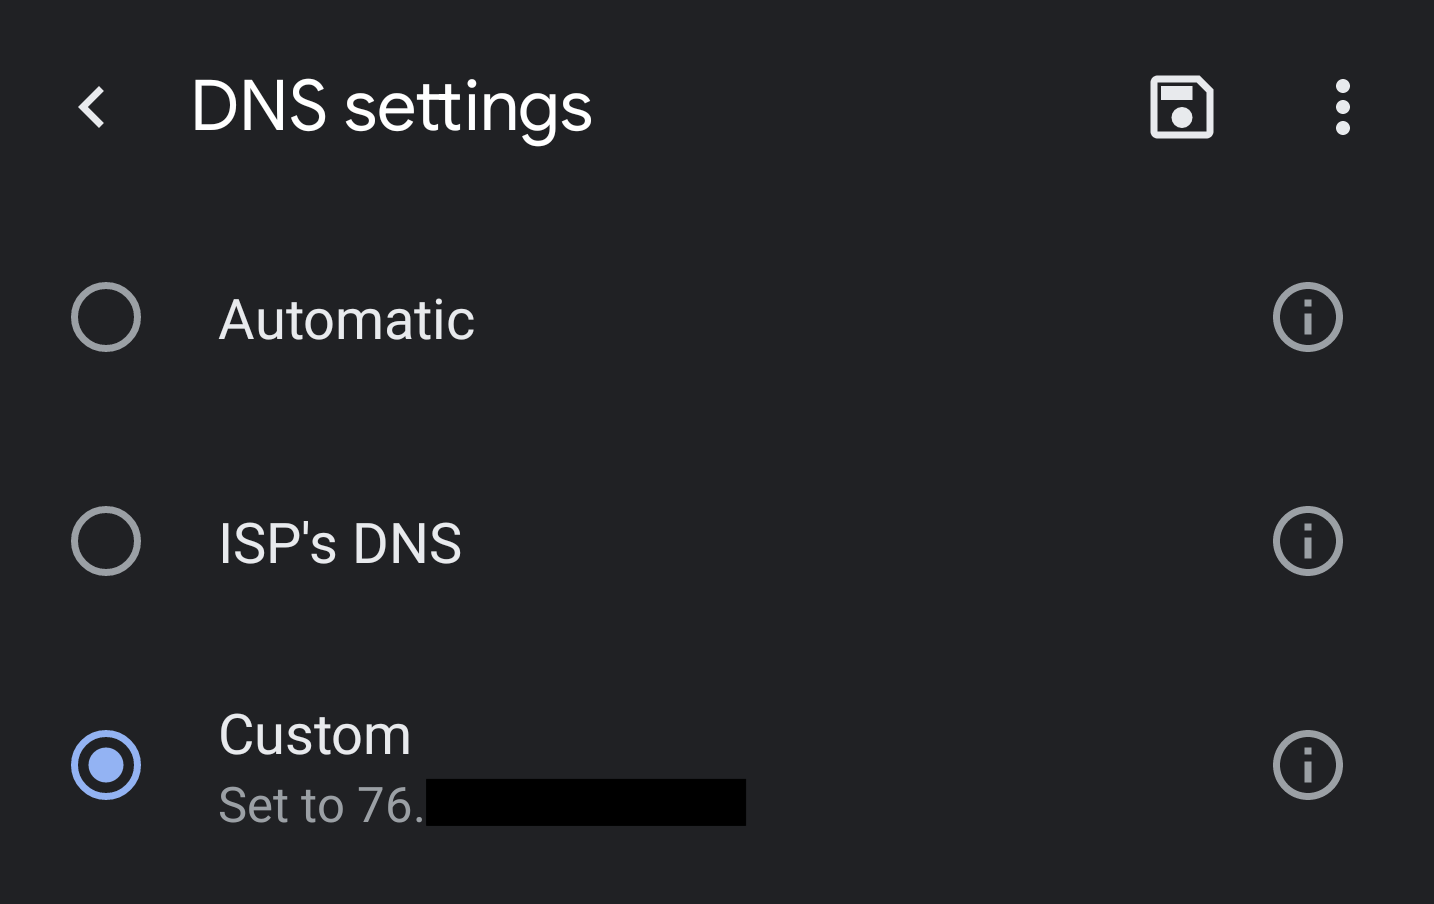
Hurray! Here’s where you set the DNS settings for your home wifi. Hit the menu item called “Custom” to start…
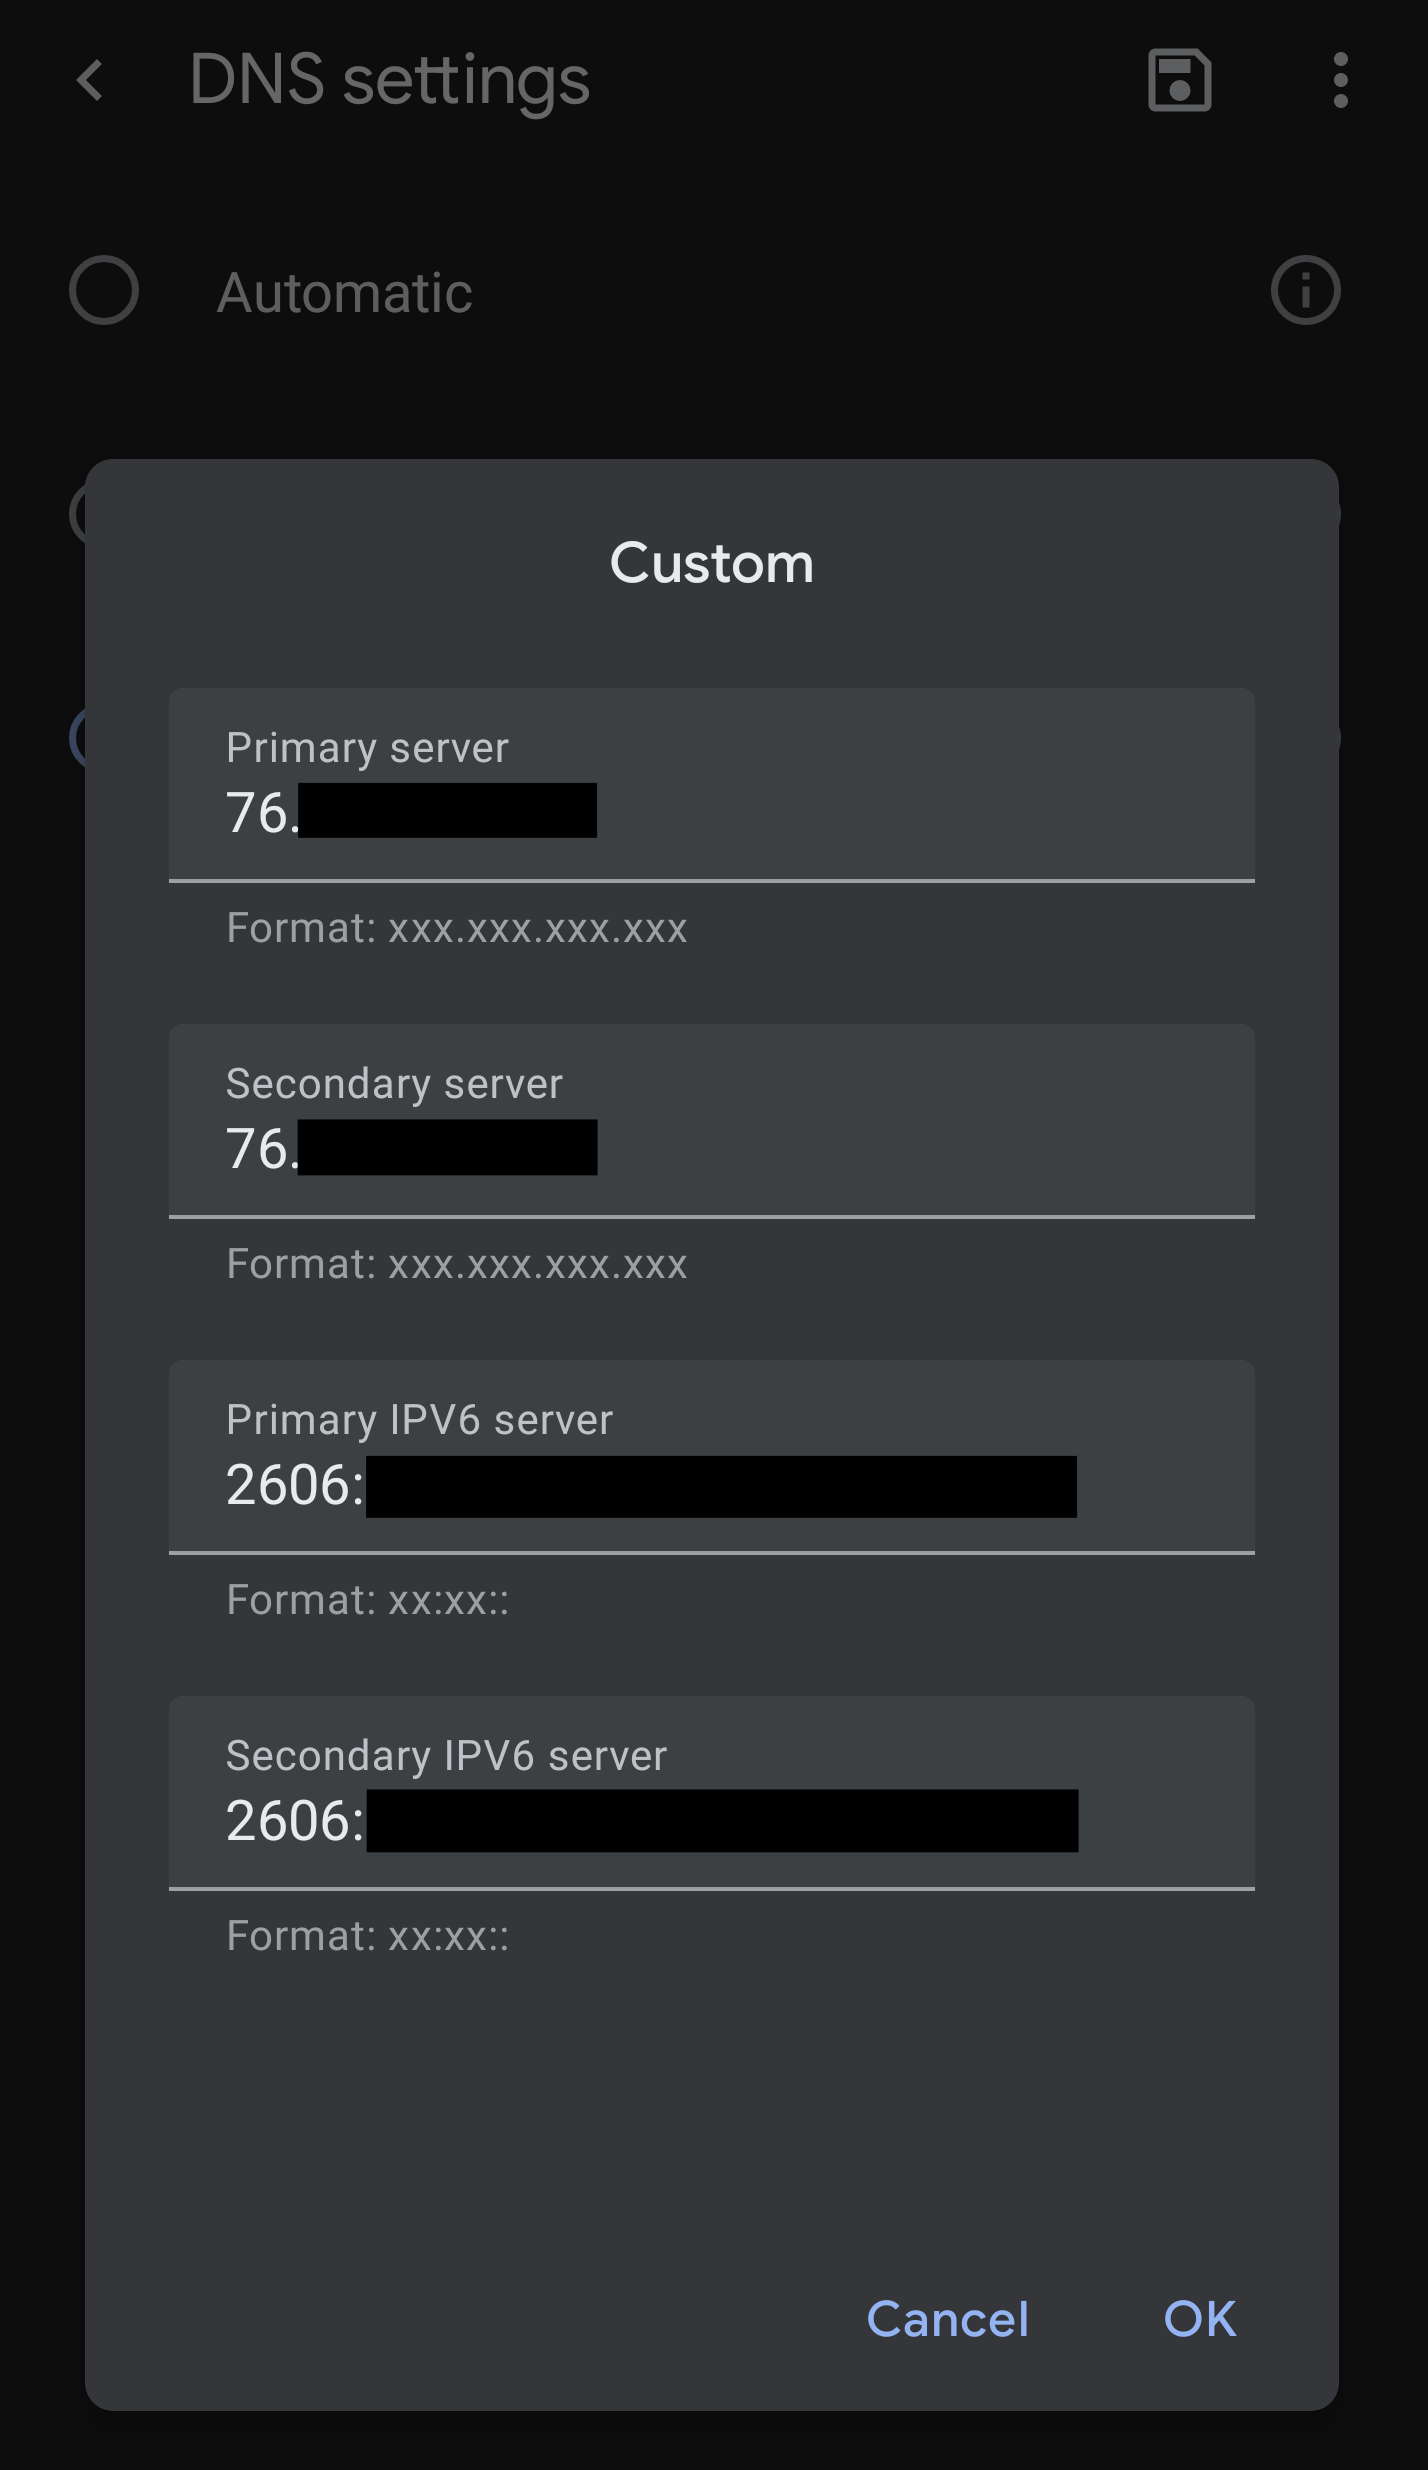
…and put all the information in that it wants. Depending on your own internet connection, you may not have an IPv6 section.
Once you’ve done that, hit the “OK” button and then hit the back button about a hundred times, you should have switched to use your preferred DNS supplier.